How to Configure a Webhook
Last updated
Was this helpful?


Last updated
Was this helpful?
The subscription method means that you can decide which webhooks are active - you do not receive data from the ones you are not interested in.
You can subscribe to the webhook in two ways.
One way is to use the admin panel, which will allow you to configure webhooks using a graphical interface, and the second is to use the endpoint.
To get to Webhooks in the admin panel head to Webhooks
Webhook name - Webhook name in the system
Active from - Date of webhook activation
Legacy - Information is webhook is working in the Legacy mode
URL - Address to which the webhook is sent
To make it easier to search for a specific webhook, you can use filtering based on the headers or use a search table in the upper right corner:
To add a new webhook subscription:
log in to the app as an Administrator
Go to Webhooks
Click the ADD NEW WEBHOOK button
Fill in the required fields
Click ADD WEBHOOK
From the dropdown list choose the webhook you'd like to subscribe to. Enter the address to which the webhooks will be sent. In addition, you can add multiple headers to the webhook however, it is not required by the system.
After saving, when the correct event is executed, the webhook will be sent to the previously entered address.
You can also subscribe to the webhook by using the endpoint:
In the body request, put the name of the webhook in eventName and the address of the service you want the data to be sent to in the URL
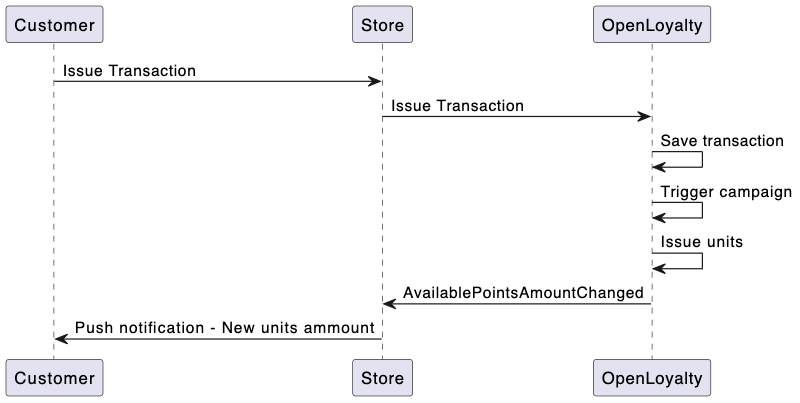
Webhook 'account.available_points_amount_changed' automatically informs whenever the number of available points in a user's account changes. The update information is presented in the form of a body containing the following information.
Webhook can be used as a trigger to execute an action on the user side of the application.


If sorting is not chosen, the rows will be returned in an unspecified order.
To sort a result, use an _orderBy parameter in query.
/api/{storeCode}/webhook/subscription
Store code