> For the complete documentation index, see [llms.txt](https://help.openloyalty.io/llms.txt). Markdown versions of documentation pages are available by appending `.md` to page URLs; this page is available as [Markdown](https://help.openloyalty.io/gamification/tiers/adding-tiers.md).
# Adding Tiers
In this section, you will learn how to add Tiers.
## Overview
This guide shows how to create tiers in the Admin Panel.
Tiers group members into levels. Each level is based on conditions, like spending or earned units. Each level can also include tier benefits.
{% hint style="warning" %}
A minimum of one tier is required in the program, with a maximum of 20 tiers per tier set.
{% endhint %}
{% hint style="info" %}
Tier benefits (sometimes called tier rewards) are attributes assigned to a tier. They are different from the **Rewards** module. Members do not see these values directly in their profile.
{% endhint %}
***
## Add a tier set and tiers
{% stepper %}
{% step %}
### Create a tier set
1. In the side menu, under **Modules**, go to **Tiers**.
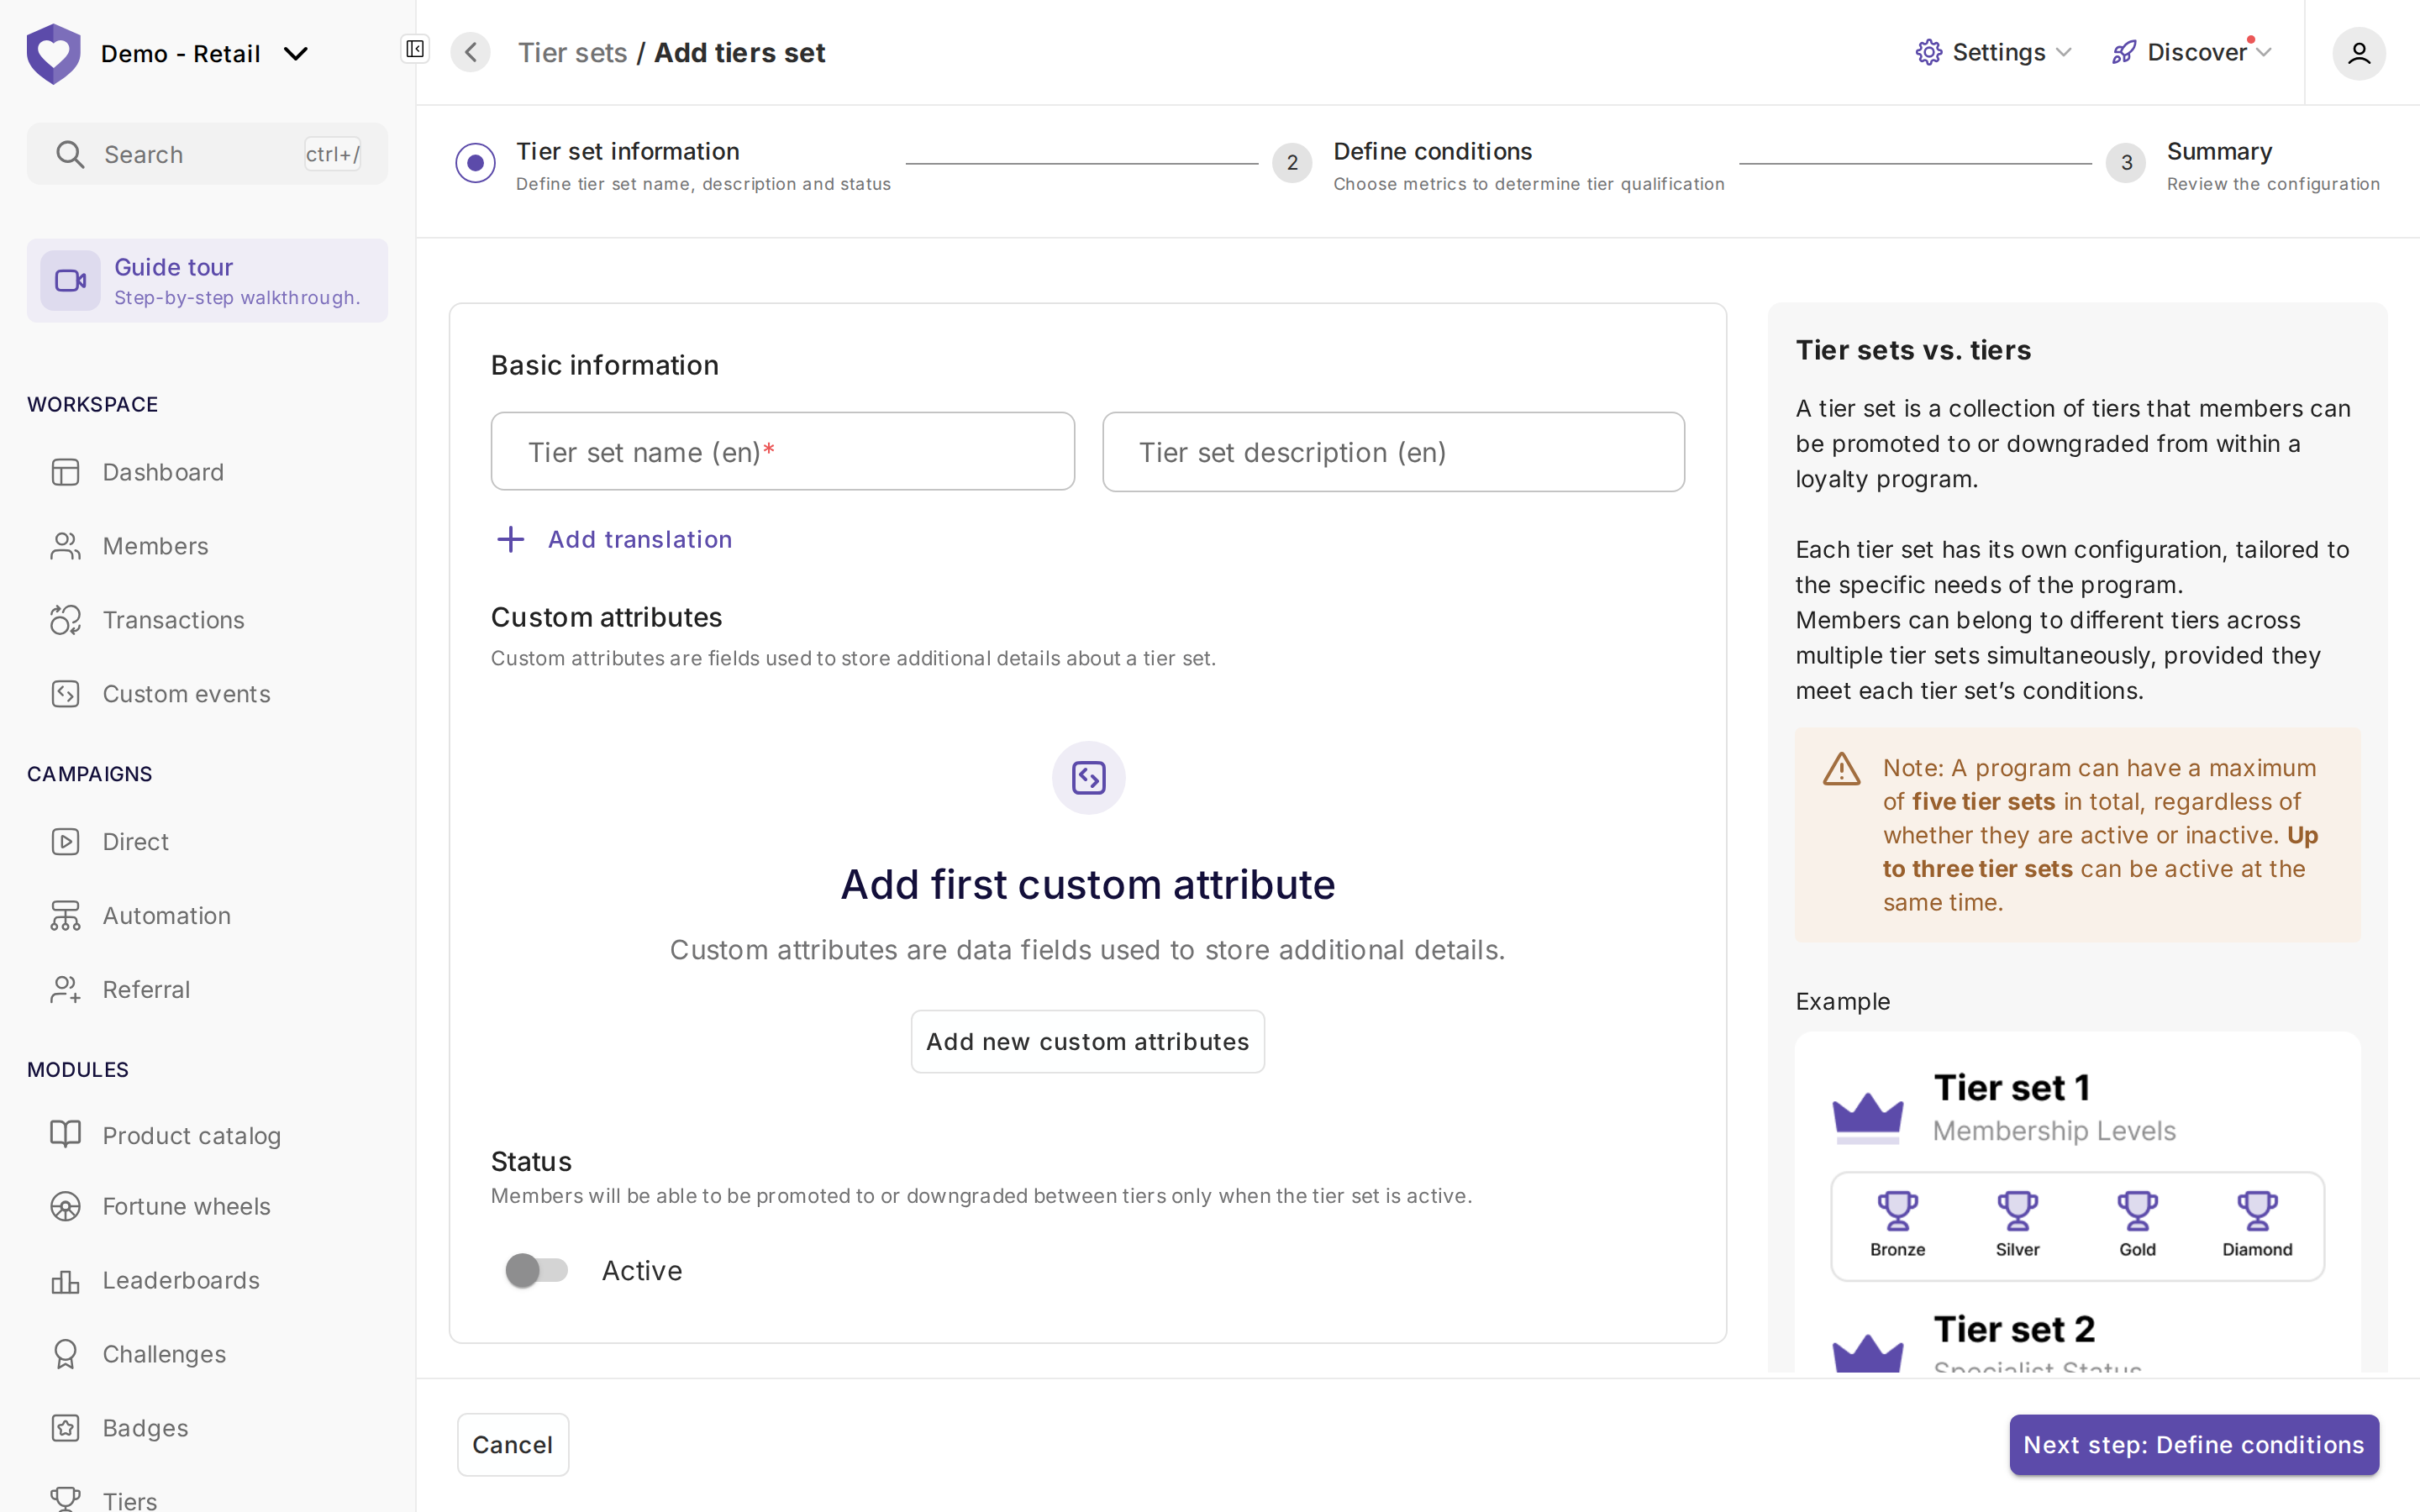
2. Click **Add tier set** and choose **New tier set** (the button also offers **Import tier sets**). A three-step wizard opens: **Tier set information**, **Define conditions** and **Summary**.
3. On **Tier set information**, enter the **Tier set name** and an optional description (use **Add translation** for other languages), add custom attributes if you need them, and set the **Status**. A program can have up to five tier sets, and up to three can be active at the same time.
4. On **Define conditions**, set:
* **1. Conditions** (up to 8):
* **Active units** (select the wallet to count).
* **Total spending**.
* **Total earned units**.
* **Months since joining the program**.
* **Cumulative earned units**.
* **2. Downgrade conditions**.
{% hint style="info" %}
If you set multiple conditions, the member must meet **all** of them. This works as an **AND** rule.
{% endhint %}
5. On **Summary**, review the configuration and save the tier set.
{% endstep %}
{% step %}
### Add tier levels
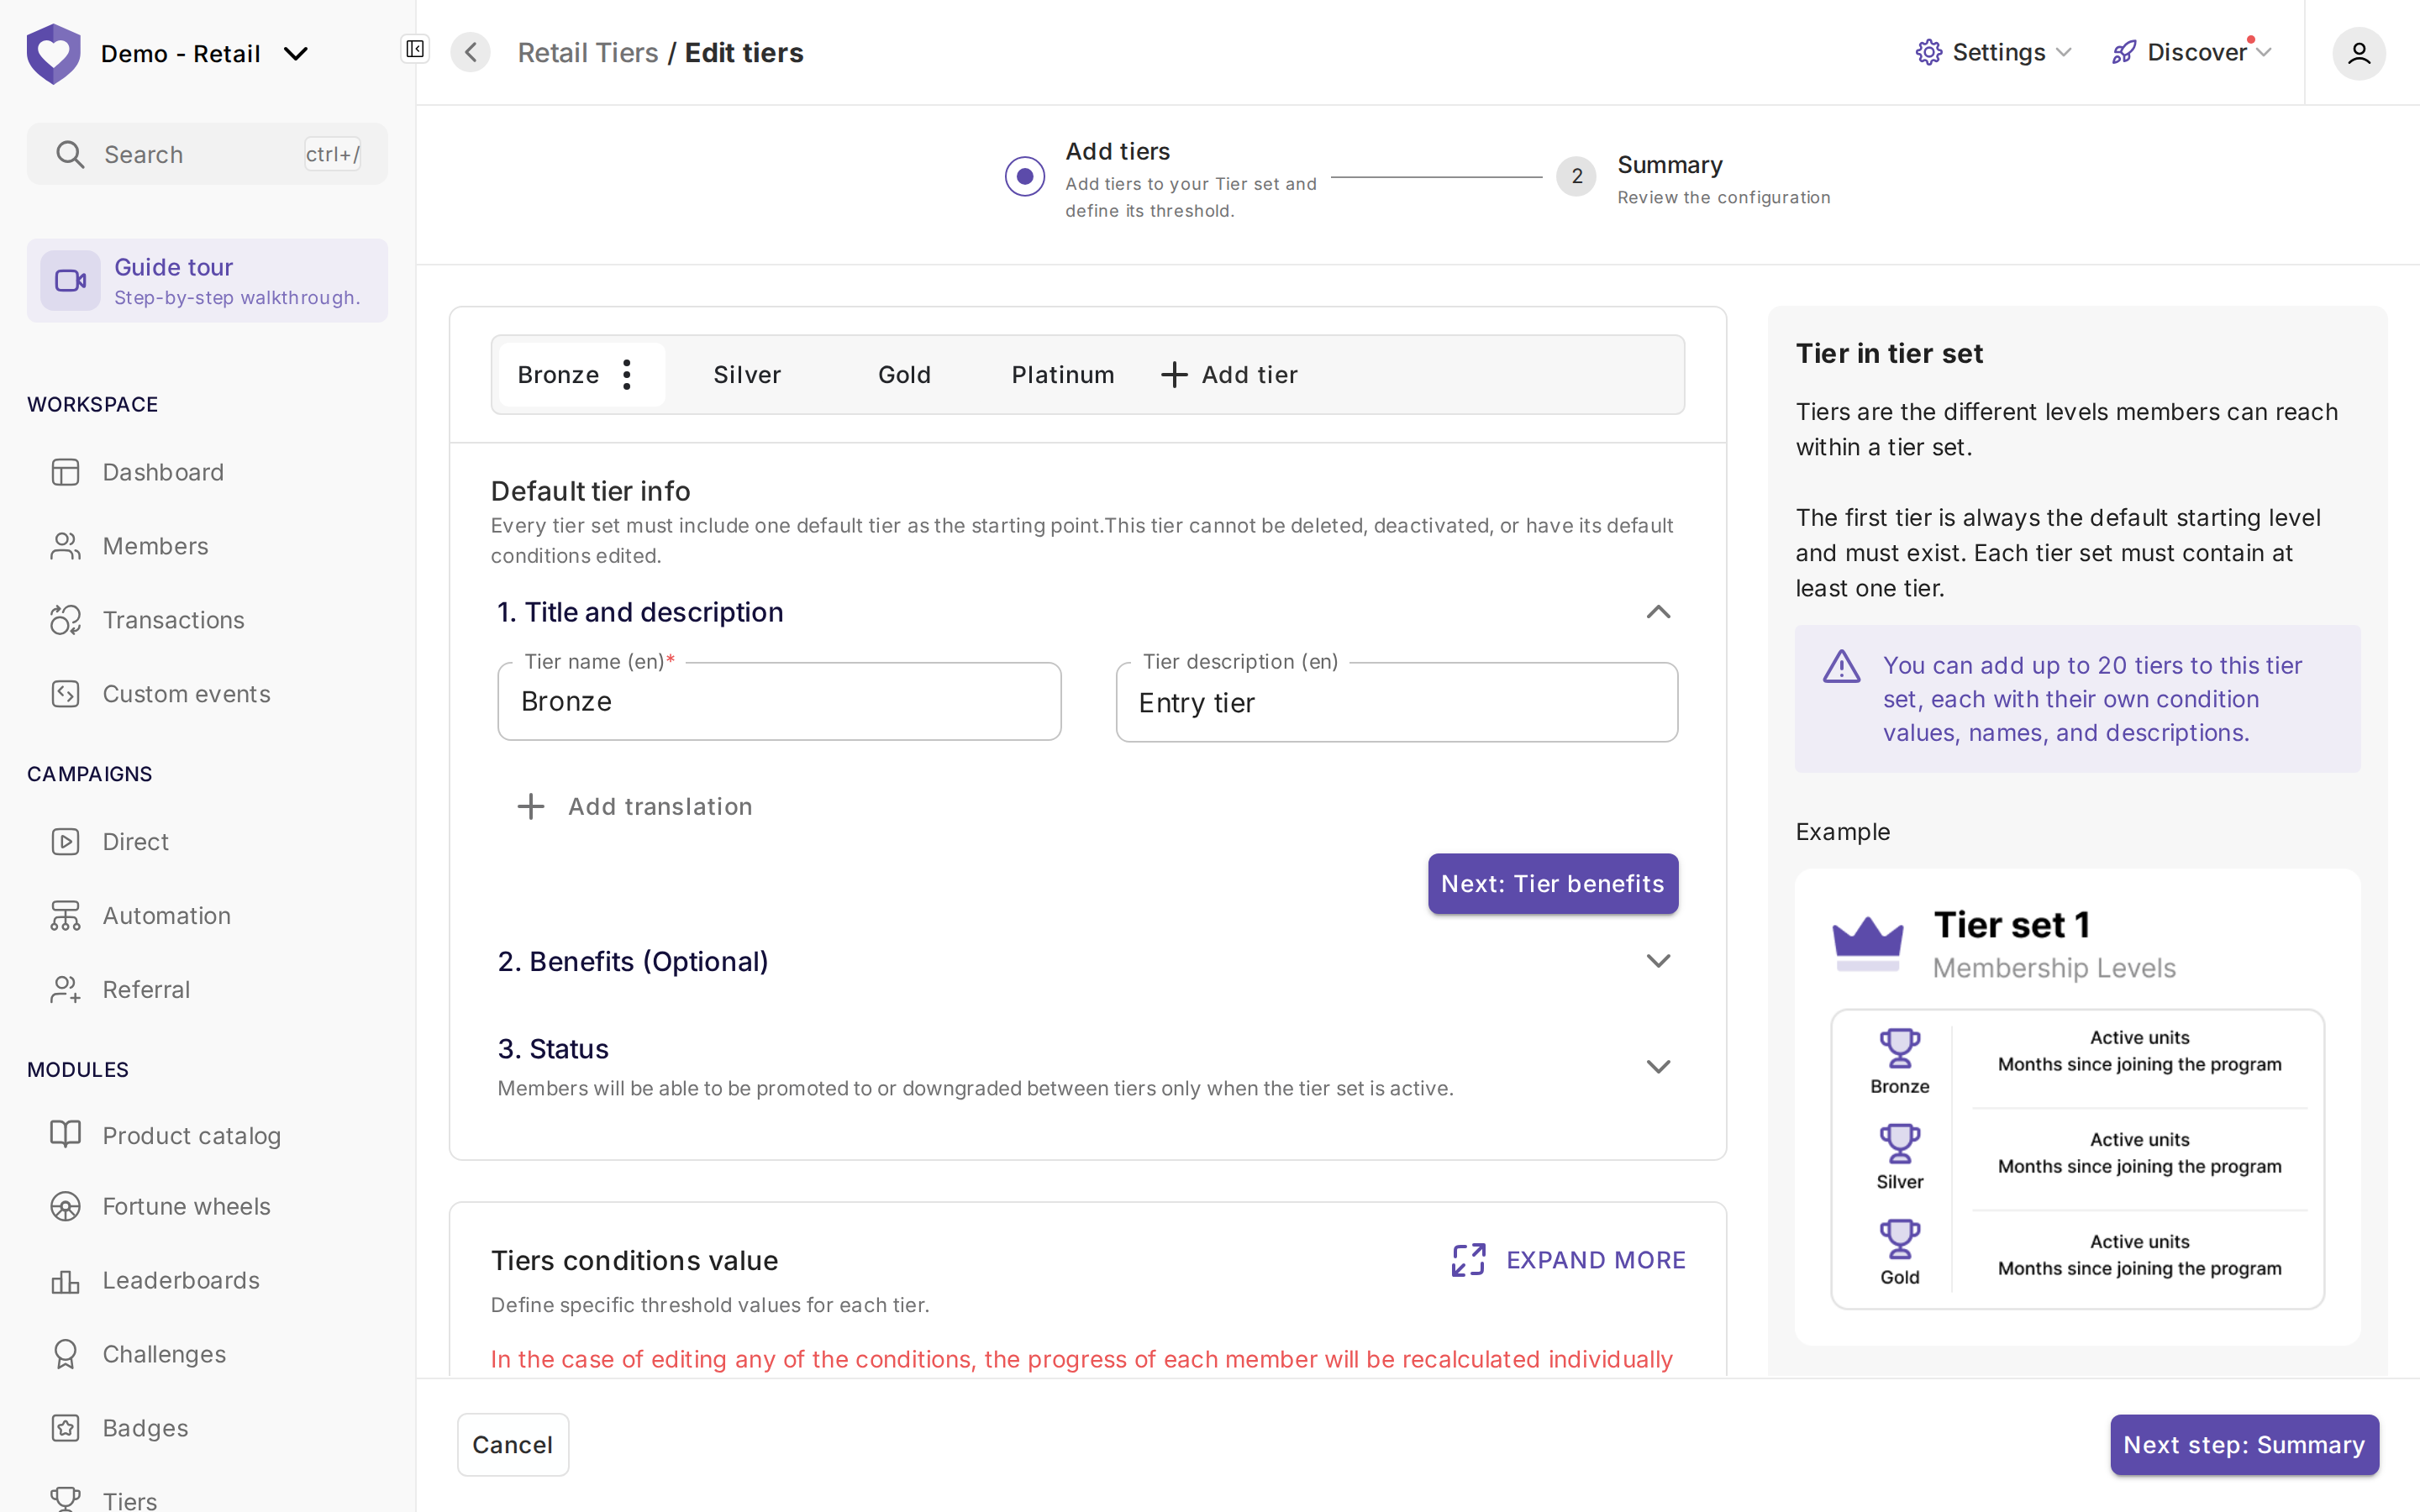
1. Open the tier set and click **Edit tiers**. Every tier set already has a default (first) tier, so the two-step **Edit tiers** wizard (**Add tiers** → **Summary**) opens on it.
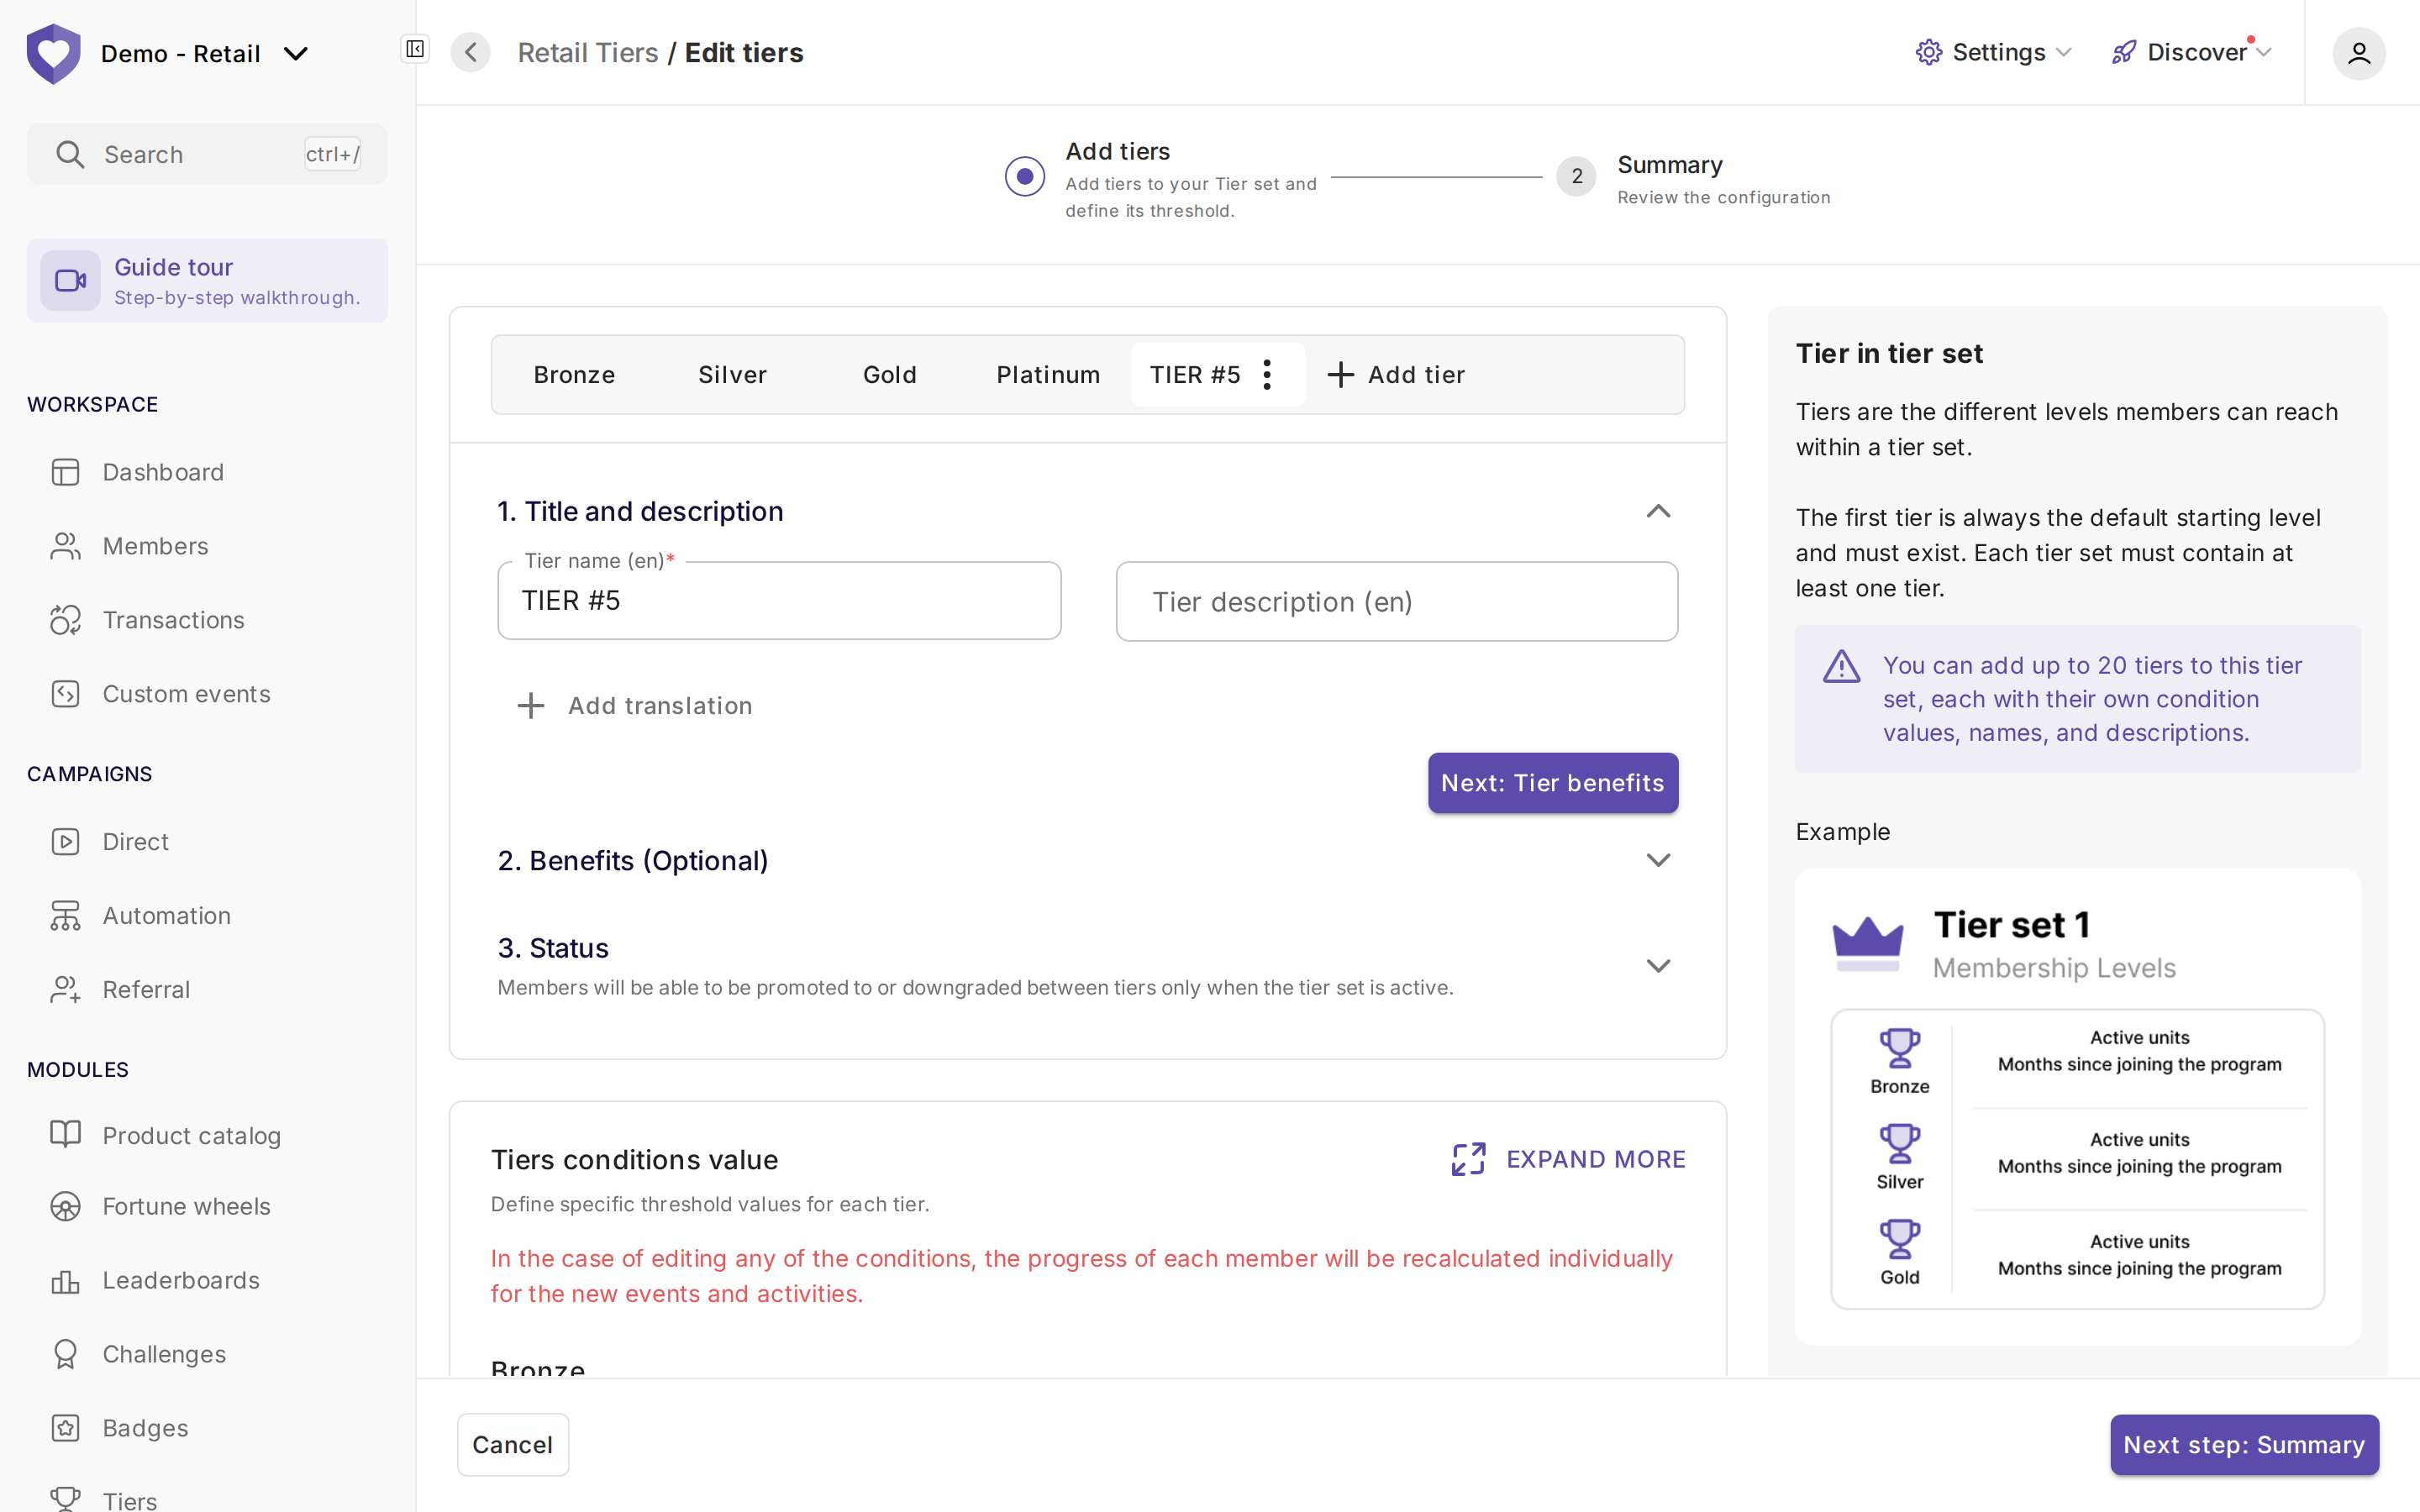
2. Click **+ Add tier**. The new tier gets its own tab (e.g. **TIER #5**) with a ⋮ menu (**Duplicate tier** / **Delete tier**). For each tier, define:
* **1. Title and description** (tier name).
* **2. Benefits (Optional)**: tier benefits (constant benefits).
* **3. Status**.
* Its threshold for each condition, under **Tiers conditions value**.
You can add up to 20 tiers to a tier set.
3. Click **Next step: Summary**, review the tiers, then click **Save changes**.
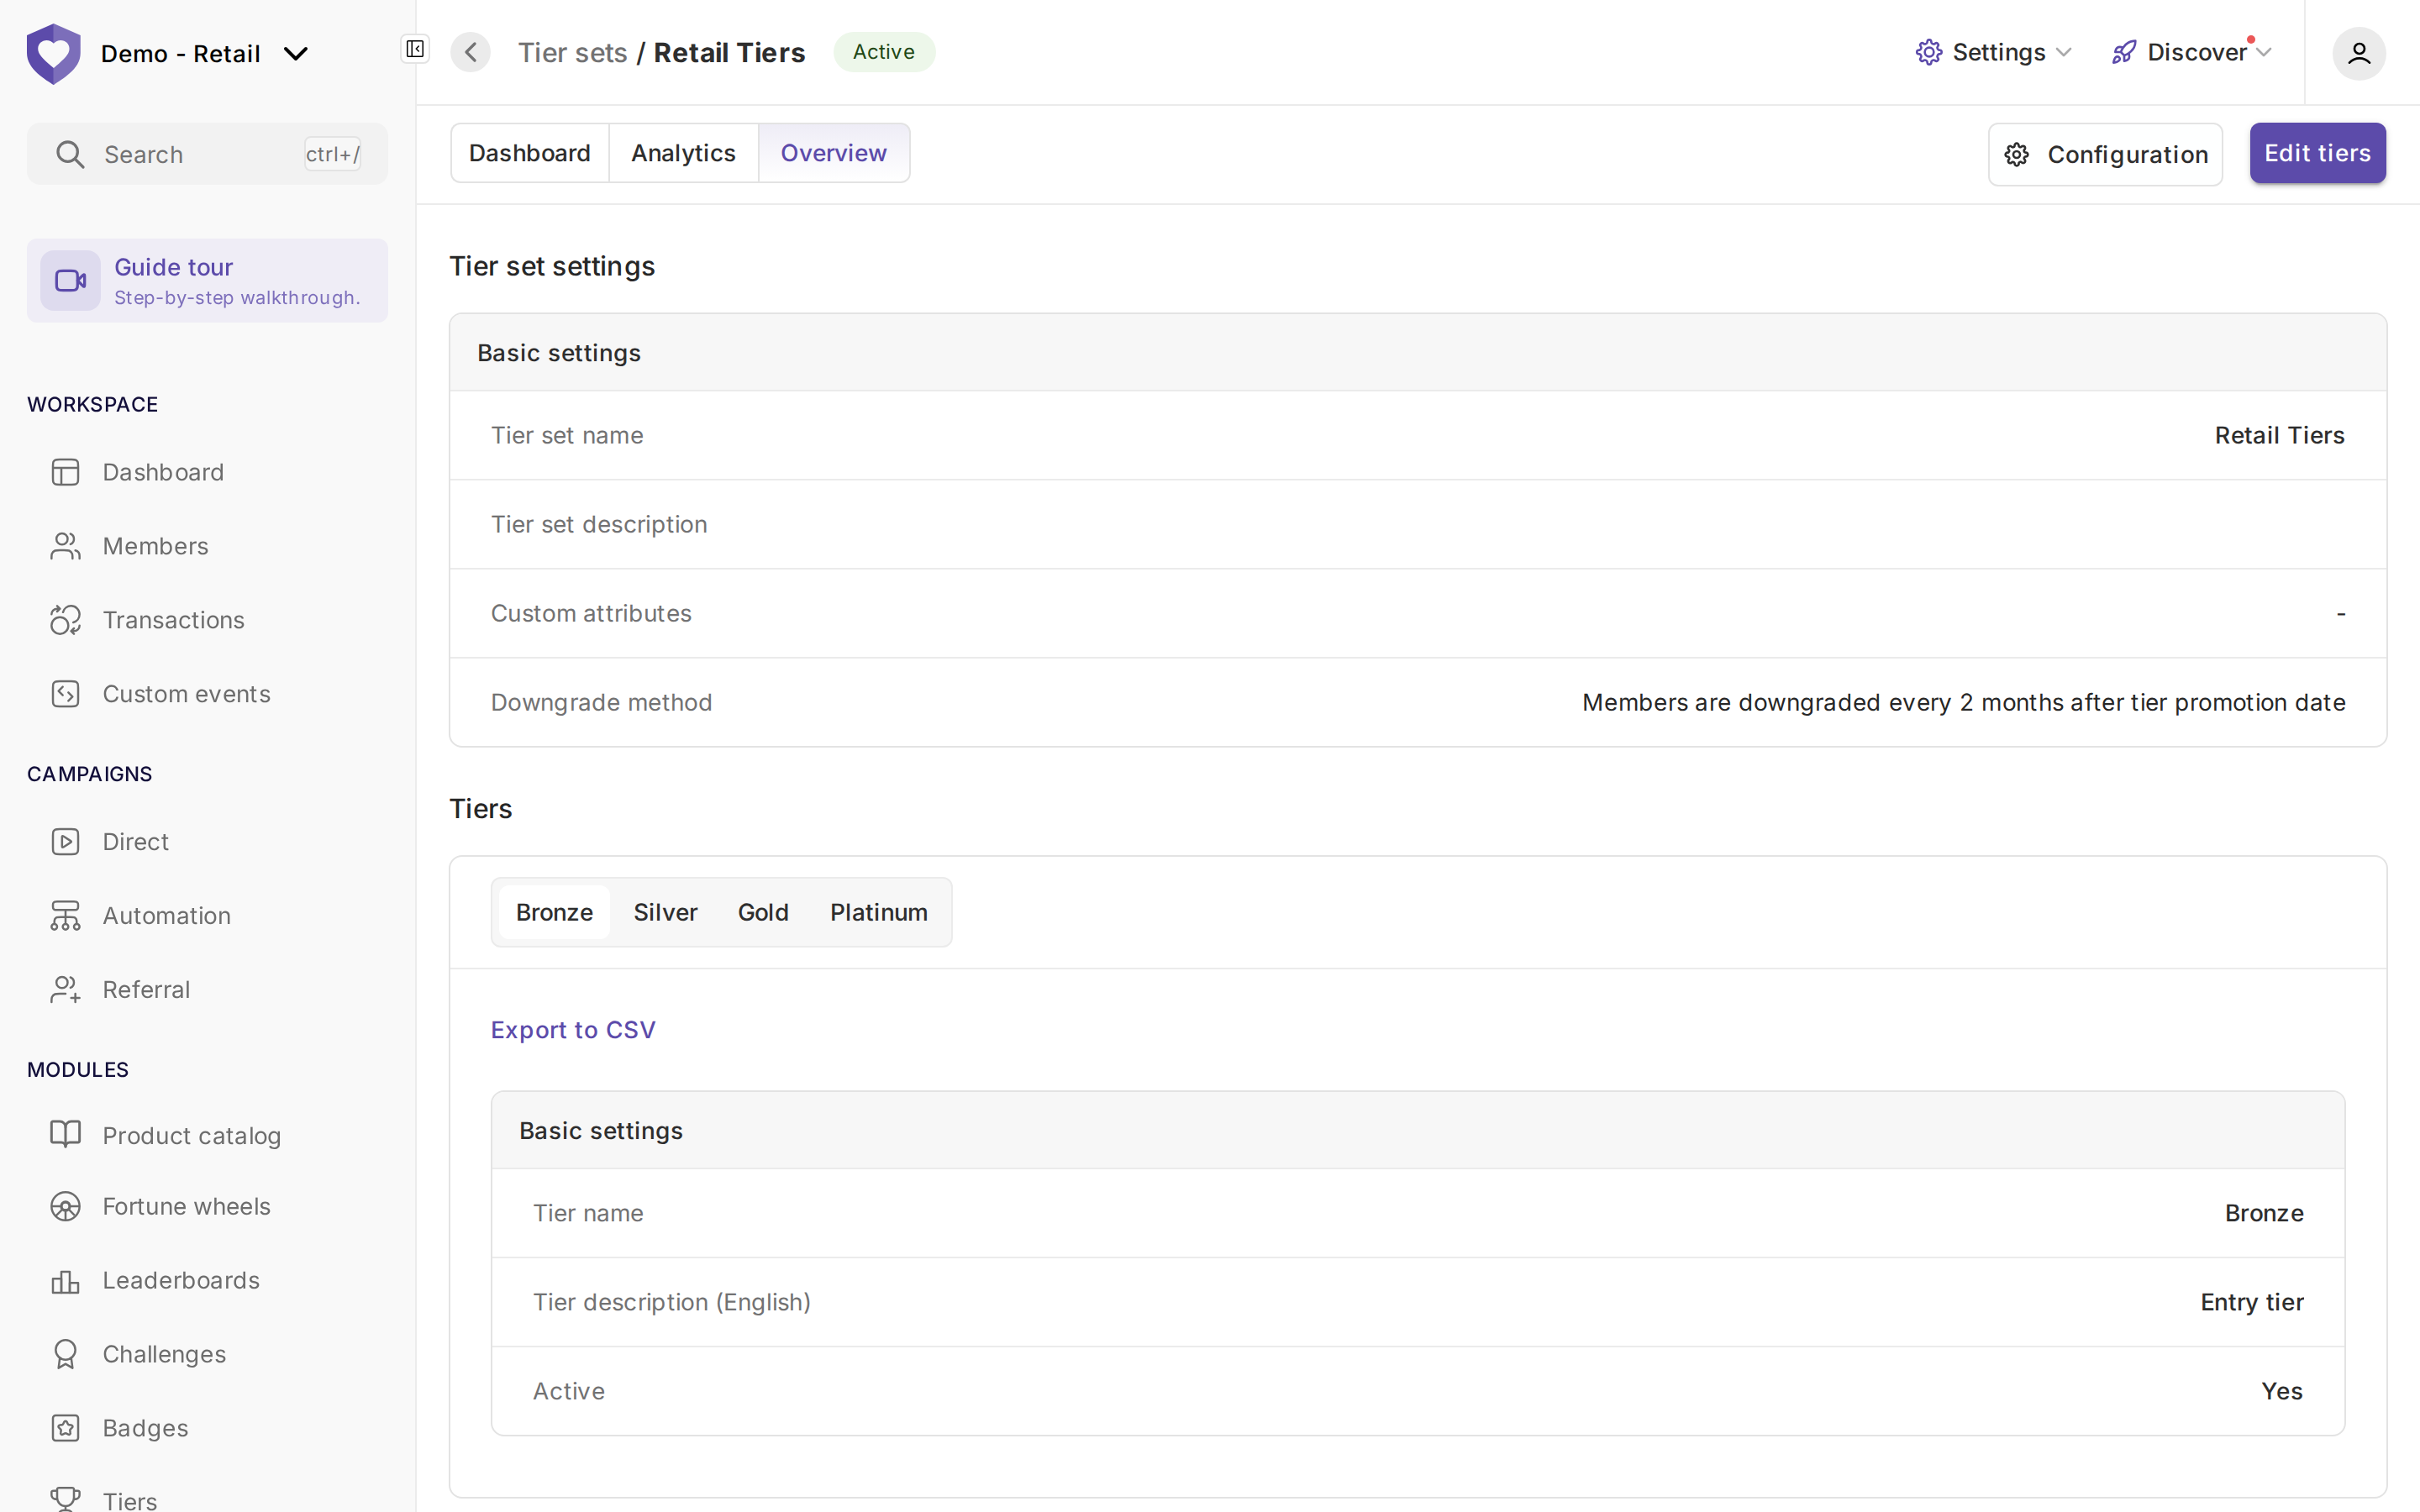
The tier set page has **Dashboard**, **Analytics** and **Overview** tabs. The **Overview** tab shows the tier set's settings and tiers, with **Configuration** and **Edit tiers** at the top right.
{% endstep %}
{% endstepper %}
***
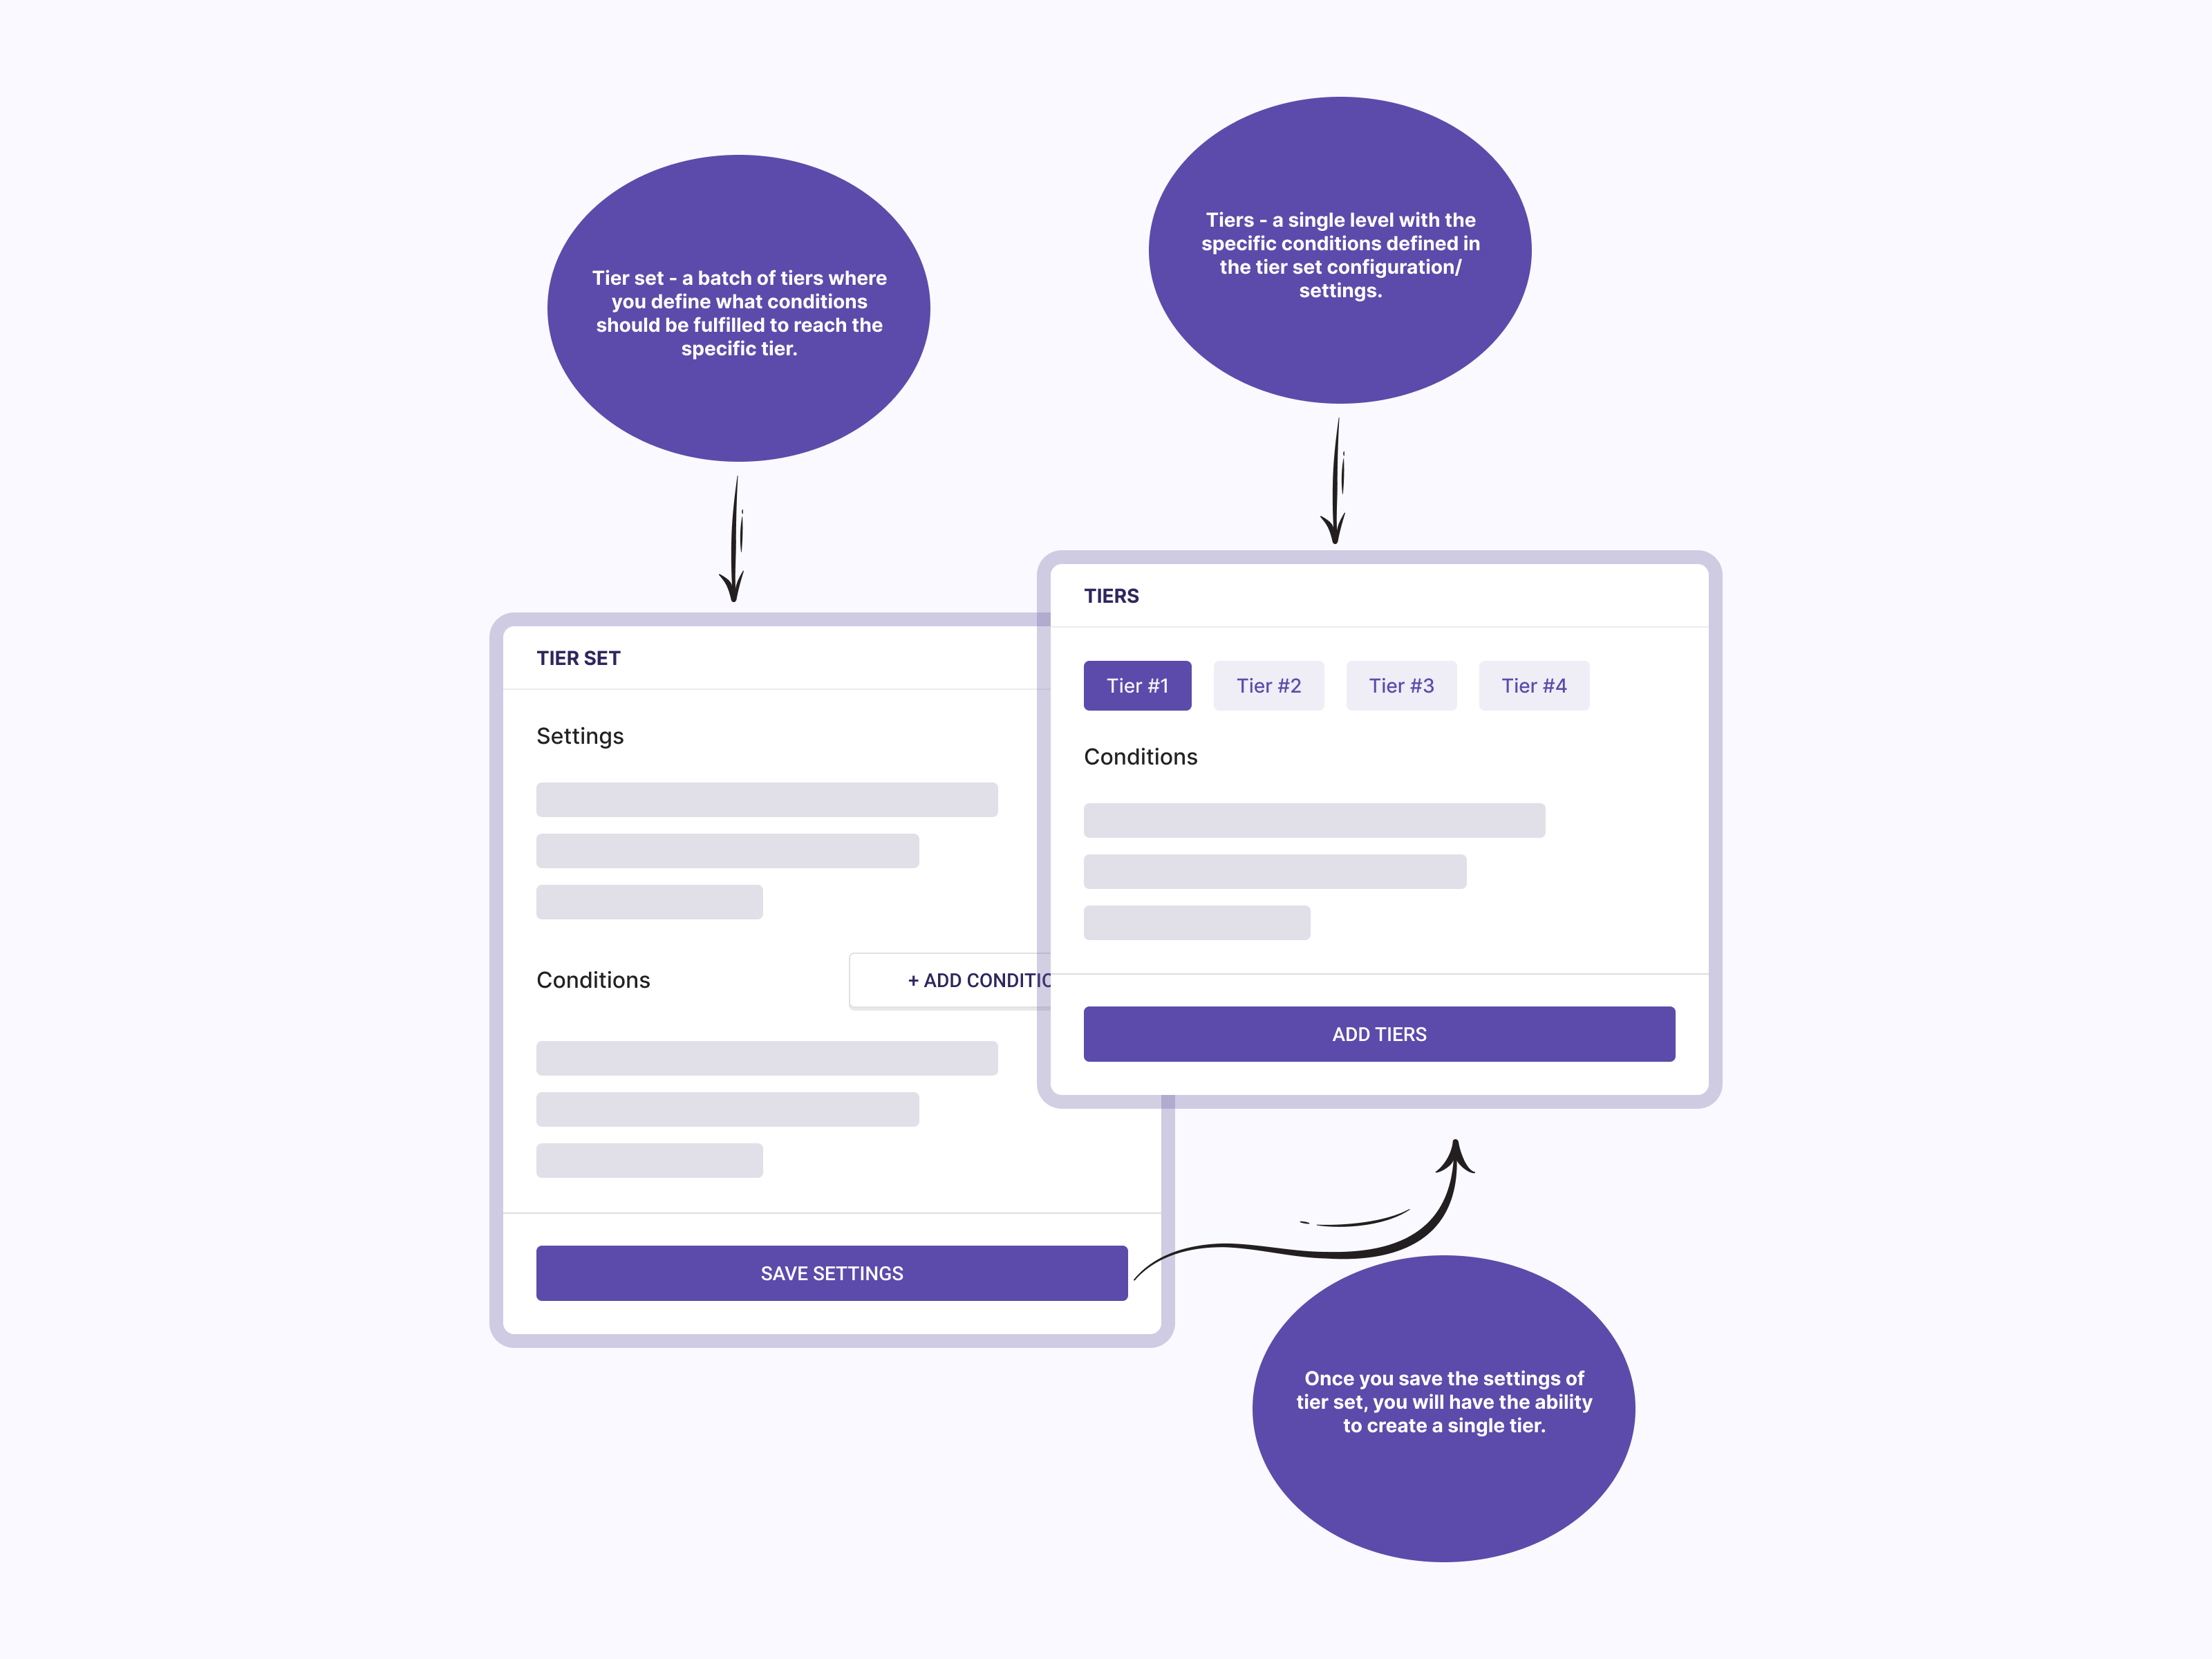
## Tier set structure
Tiers let you shape your loyalty program into clear levels. Below is a simple view of how tiers are structured:
---
# Agent Instructions
This documentation is published with GitBook. GitBook is the documentation platform designed so that both humans and AI agents can read, navigate, and reason over technical content effectively. Learn more at gitbook.com.
## Querying This Documentation
If you need additional information that is not directly available in this page, you can query the documentation by asking a question.
Perform an HTTP GET request on the following URL with the `ask` and `goal` query parameters:
```
GET https://help.openloyalty.io/gamification/tiers/adding-tiers.md?ask=&goal=
```
`ask` is the immediate question: it should be specific, self-contained, and written in natural language.
`goal` is what the user is ultimately trying to achieve, the reason they need the answer. Sharing it helps GitBook give you a better, more relevant answer. A goal is most helpful when it describes the outcome the user wants rather than restating the question. For example, with `ask=how do I create an API token`, a goal like `automate deployments from our CI pipeline` lets GitBook tailor the answer to that use case.
The response will contain a direct answer to the question and relevant excerpts and sources from the documentation.
Use this mechanism when the answer is not explicitly present in the current page, you need clarification or additional context, or you want to retrieve related documentation sections.